Well, I didn't win, but I sure gave it my best shot.
Thanks for all your votes!!!
Wednesday, July 18, 2012

Saturday, June 16, 2012
finalist
Thank you to all who voted for me in the Mary Kay Makeover Contest!
I am pleased to announce that I am a finalist!!!
Three grand prize winners will be chosen and announced by July 18, so keep your fingers crossed for me!
Thursday, June 14, 2012
get your votes in!
Voting ends tomorrow at 12 noon Central Standard Time (that's 10am PST, 11am MST, and 1pm EST)
Please get your votes in before it all ends!
https://www.mkmakeovercontest.com/gallery.jsp?id=177031
Thank you! Thank you! Thank you!
Please get your votes in before it all ends!
https://www.mkmakeovercontest.com/gallery.jsp?id=177031
Thank you! Thank you! Thank you!
Tuesday, June 5, 2012
vote for me!
Hello, friends! I need a favor from all of you...please vote for me in the Mary Kay Makeover Contest!
Click here to vote:
https://www.mkmakeovercontest.com/gallery.jsp?id=177031
Votes are limited to five (5), per day per person.
Voting lasts from June 5 - June 15, so get busy!
Thank you for your help!!!
Friday, February 24, 2012
nail care
Do your nails peel and crack easily? What about breakage? Well, a few easy tips can help you take care of your nails and prevent further distress.
First off, protection. You need to protect your nails. You do this by using physical barriers. Your first tool for this is a good ol' pair of gloves. If you are cleaning your home with harsh chemicals wear some plastic, rubber, or latex gloves. You can buy these gloves at the dollar store, and they are worth the investment. After all, it is easier to prevent damage than to repair it.
Your second tool is clear nail polish. When painting your nails, always start with a base coat of clear polish. If you like glitter in your nail polish, a clear coat underneath will provide a barrier so your actual nail won't get scratched by the glitter. If you favor darker shades, wearing a clear polish can help protect your nail from becoming stained.
If you don't like painting your nails, I would suggest wearing a clear coat of polish instead of having bare nails. A simple clear coat offers a small protection against whatever you may come in contact with as you go about your day.
That said, I would recommend letting your nails go natural (for at least a day) between polishings. Polish doesn't allow your nails to breath or take in moisture, which can make them brittle and breakable. I usually do my nails about once a week, and I let them air out for about a day in between polishings. On that day, I really give them special treatment, so they can last another week underneath my polish. I apply cuticle oil, cocoa butter, you name it, and let them soak it in. It has really made a difference for my nails.
If you are in the habit of sporting bare nails, moisturize them often. Dry weather can affect nails and cuticles, too. Whenever you apply hand lotion, massage some into your nails and cuticles to head off this problem.
You also want to take special care with what you put on your nails. While removers containing acetone tend to work quite well, they are hard on your nails. Instead, try a non-acetone remover. It might take a little while longer to remove your polish, but your nails will thank you. And as I mentioned earlier, it is easier to prevent damage than to repair it.
Bottom line: be nice to your nails, and they will be nice to you.
Best of luck in your own nail care :-)
Monday, February 20, 2012
CONCEAL the Madness!!
OK so heres the 411.
Yellow Concealer: great for under the eyes. the yellow color cancels out the blue/purple of under eye bags; although recently i heard peach works better. i've never tried that one though, so if you do be sure n lemme know whatchu thinkk!
Green Concealer: cancels out reds of blemishes and acne scars, it hides them quite well in my opinion if you get the right shade of green (darker for darker skin tones and lighter for lighter skin tones)
Any Concealer about Two Shades Darker than YOUR Skin: great for contouring your features, making your cheekbones pop more or your nose sharper.
Hope you enjoy :]
Tuesday, February 7, 2012
I love me some Bubz y'all
So honestly, in my spare time one thing I really love to do is sit around and watch youtube videos on hair and make up tutorials etc to get ideas. Now of course I have some people that are more of my favorites than others, but I ain't no hater! So credit to BubzBeauty for being incredible :]
Now, honestly one of my New Years Resolutions is to try and be less damaging to my hair. I admittedly am quite cruel to it at times; I dye it, use heating products, brush it when its wet..all kind of horrors. This is coming to a stop. This video worked really well for me because I'm not a big fan of my natural hair and am constantly looking for new ways to do it without damaging it such as straighening/curling irons do. SO I hope you enjoy this as much as I did! Peace out home skillets :]
Now, honestly one of my New Years Resolutions is to try and be less damaging to my hair. I admittedly am quite cruel to it at times; I dye it, use heating products, brush it when its wet..all kind of horrors. This is coming to a stop. This video worked really well for me because I'm not a big fan of my natural hair and am constantly looking for new ways to do it without damaging it such as straighening/curling irons do. SO I hope you enjoy this as much as I did! Peace out home skillets :]
Saturday, February 4, 2012
longer looking lashes
I have a little trick to get longer looking lashes: coat lashes from root to tip with brown mascara, then gently coat the ends with black mascara. This draws greater attention to the ends of your lashes, making them appear longer. Neat, huh?
Wednesday, February 1, 2012
Oh headbands, I could write you a poem..
Roses are Red
Violets are Blue
I have horrible hair on my head
and dont know what to do!?
(HEADBANDS, thats what I should doo!)
Bad hair days are the WORST, we all know it. it's the pits. how to remedy this, you ask!? Well Sara gave you one genius solution with homemade flower clips that are cute and effective :]
One of my personal favorite solutions is headbands. People are fooled into thinking you have cute hair, whaat! Amazing right? Makes my day better every time people compliment my hair on a bad day.
So simple. Sometimes my hair is just simply unmanagable and requires being put up, and warning now..I got picture happy for this blog because I love headbands and own seriously a million and four. BUT c'mon, admit the headband helps!


Now, honestly naturally I have that half-wavey half-straight hair that just doesn't feel the need to conform to either one, and sometimes when I'm running late I OWN my natural hair. Its the best thing to do even on days I'm not running late, just distract from the fact a little bit that my hair is totally insane. You know, no biggie.


And honestly, even when I take the time to do my hair..I feel it needs just a lil something extra n throw on a headband for pretty :D


headbands are your friends. accept it. embrace it.
Violets are Blue
I have horrible hair on my head
and dont know what to do!?
(HEADBANDS, thats what I should doo!)
Bad hair days are the WORST, we all know it. it's the pits. how to remedy this, you ask!? Well Sara gave you one genius solution with homemade flower clips that are cute and effective :]
One of my personal favorite solutions is headbands. People are fooled into thinking you have cute hair, whaat! Amazing right? Makes my day better every time people compliment my hair on a bad day.
So simple. Sometimes my hair is just simply unmanagable and requires being put up, and warning now..I got picture happy for this blog because I love headbands and own seriously a million and four. BUT c'mon, admit the headband helps!

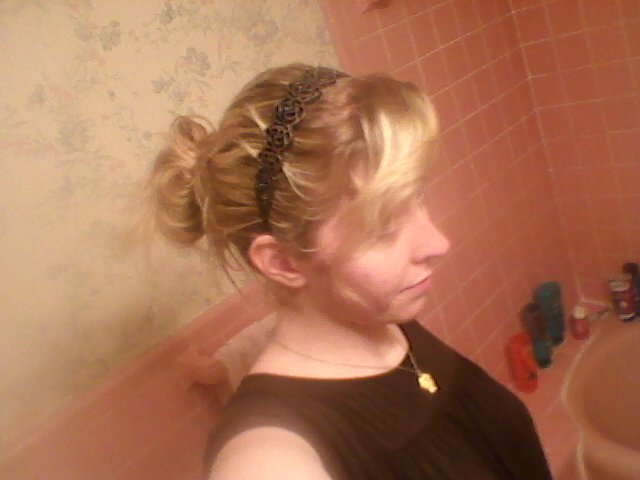
Now, honestly naturally I have that half-wavey half-straight hair that just doesn't feel the need to conform to either one, and sometimes when I'm running late I OWN my natural hair. Its the best thing to do even on days I'm not running late, just distract from the fact a little bit that my hair is totally insane. You know, no biggie.


And honestly, even when I take the time to do my hair..I feel it needs just a lil something extra n throw on a headband for pretty :D


headbands are your friends. accept it. embrace it.
Friday, January 20, 2012
Homemade Hairclips & the Wily Ways of Women
You know those days when you just don't feel like doing your hair? Or worse: you do, but you don't have time? Well, I don't know about you, but I resort to trickery on those days.
You heard me: trickery. I'm a woman. I'm wily. I'm mysterious. I'm tricksy.
I know you are on the edge of your seat dying to hear my secret. Well, I'll give it to you: Accessorizing. Flowers, ribbons, headbands, you name it. Add a flower clip to your hair and viola! You just turned a bad hair day into a good one. The best part: no one who sees you will even know your secret. Instead, they will be distracted by the cuteness of your accessory. Suckers.
Of course hair accessories can also be used to top off an otherwise lovely-looking 'do, but I really get a kick out of tricking people into thinking my hair looks great when, in fact, I know it doesn't.
Flower clips often cost more than I'm willing to pay, so instead I started making my own. It's pretty easy if you want to give it a shot.
First, gather your materials. You will need flowers, alligator clips (I got mine at Sally Beauty Supply), and glue (I used hot glue, but you can try Mod Podge, superglue, or something else if you would like).
I'm enough of a cheapskate that I will usually look out for flowers at the dollar stores or on sale or clearance. I found these flowers at Kmart for only 30 cents on clearance (and that's including taxes, people):

Select which flowers you want to use, and pop them off of the stems.


If the blossom doesn't come off the stem easily, you can use wire cutters to cut it off.
I also use a pair of wire cutters to cut off the little nub that connects the flower to the stem:


Now you can simply glue the flower to your alligator clip. You will want to hold the alligator clip open during this process so you don't accidentally glue the clip shut. I like to put the end of the clip on my finger to hold it open. If another method works better for you, then go for it.

You want to glue the flower close to the end of the alligator clip, but not so close that you can't open and close the clip. Hold it open until the glue is dry.
Now let's get creative! Sometimes I get a flower like this, which could use a little help.

Hello, sad little flower.
The first thing I did to this flower was take it apart.

To take a flower apart, you want to just pull off that green thing on the back. (I'm sure there's a term for that, but I don't know what it is).


Because this flower is so sad, I wanted to add more petals from other flowers to give it some fulness.

For extra pizzaz, you can also add sequins, rhinestones, or glitter. I didn't have any rhinestones on hand, but I think a big rhinestone in the center would have been really cute for this flower. You can also put small rhinestones around the center.
Glitter is a great addition as well. I like to get a paintbrush, and lightly "paint" the edges of the petals with glue (Elmer's is fine, but I used Mod Podge). I then dipped the petals in glitter. Glitter along the edges gives your flower a more subtle sparkle.
I tried to take pictures of the glitter-ing, but alas, I am not a photographer. You'll just have to imagine what these flowers look like with glitter.
These are the flower clips I made today (click to enlarge):

Some have glitter and some don't. In any case, they are easy to make and oh-so-cute!
These flower clips are a great addition to a side ponytail, a messy bun, or even just behind the ear.

Best of luck in your own trickery (wink, wink).
Note: You can line your clips with ribbon, but I don't think they stay put in my hair quite as well. If you like the look of a ribboned clip, do what makes you happy.
You heard me: trickery. I'm a woman. I'm wily. I'm mysterious. I'm tricksy.
I know you are on the edge of your seat dying to hear my secret. Well, I'll give it to you: Accessorizing. Flowers, ribbons, headbands, you name it. Add a flower clip to your hair and viola! You just turned a bad hair day into a good one. The best part: no one who sees you will even know your secret. Instead, they will be distracted by the cuteness of your accessory. Suckers.
Of course hair accessories can also be used to top off an otherwise lovely-looking 'do, but I really get a kick out of tricking people into thinking my hair looks great when, in fact, I know it doesn't.
Flower clips often cost more than I'm willing to pay, so instead I started making my own. It's pretty easy if you want to give it a shot.
First, gather your materials. You will need flowers, alligator clips (I got mine at Sally Beauty Supply), and glue (I used hot glue, but you can try Mod Podge, superglue, or something else if you would like).
I'm enough of a cheapskate that I will usually look out for flowers at the dollar stores or on sale or clearance. I found these flowers at Kmart for only 30 cents on clearance (and that's including taxes, people):

Select which flowers you want to use, and pop them off of the stems.


If the blossom doesn't come off the stem easily, you can use wire cutters to cut it off.
I also use a pair of wire cutters to cut off the little nub that connects the flower to the stem:


Now you can simply glue the flower to your alligator clip. You will want to hold the alligator clip open during this process so you don't accidentally glue the clip shut. I like to put the end of the clip on my finger to hold it open. If another method works better for you, then go for it.

You want to glue the flower close to the end of the alligator clip, but not so close that you can't open and close the clip. Hold it open until the glue is dry.
Now let's get creative! Sometimes I get a flower like this, which could use a little help.

Hello, sad little flower.
The first thing I did to this flower was take it apart.

To take a flower apart, you want to just pull off that green thing on the back. (I'm sure there's a term for that, but I don't know what it is).


Because this flower is so sad, I wanted to add more petals from other flowers to give it some fulness.
Stack the petals the way you like, and put the flower back together. You can even stack petals from different kinds of flowers. If the little green thing won't fit back on, you can just glue your stack together.
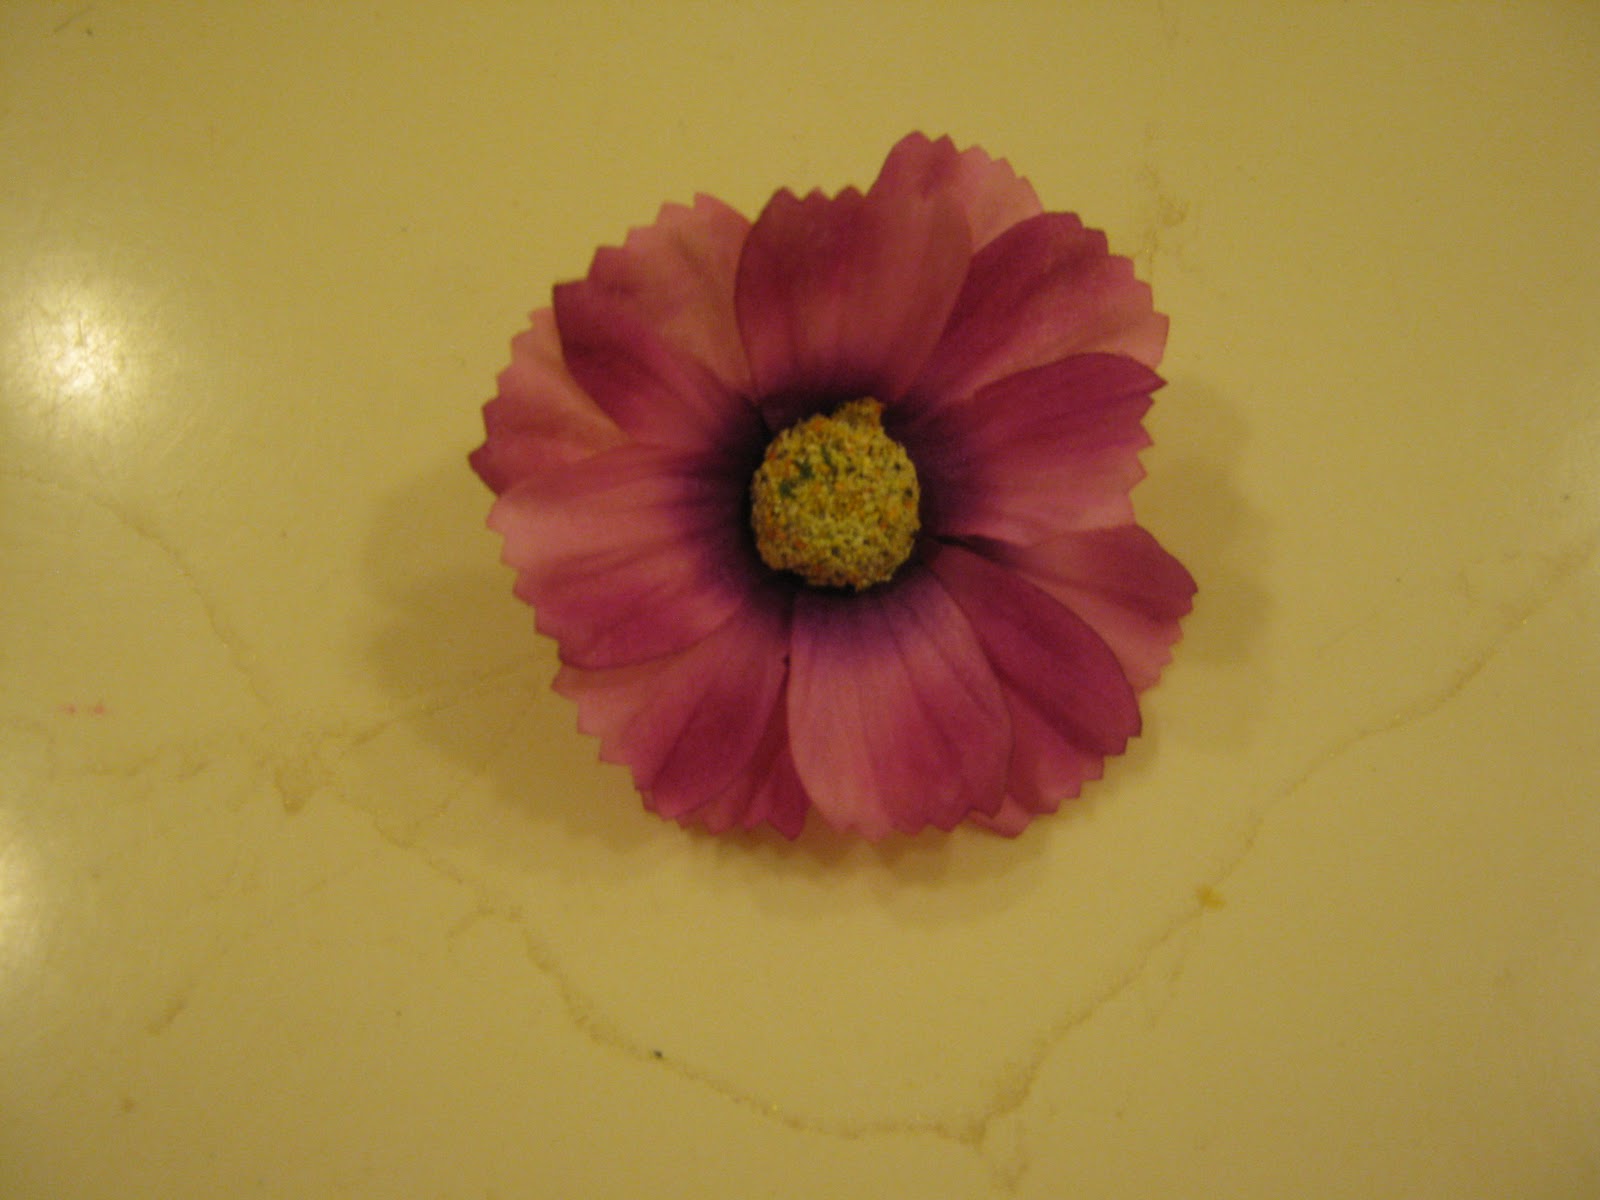
Happy flower!
For extra pizzaz, you can also add sequins, rhinestones, or glitter. I didn't have any rhinestones on hand, but I think a big rhinestone in the center would have been really cute for this flower. You can also put small rhinestones around the center.
Glitter is a great addition as well. I like to get a paintbrush, and lightly "paint" the edges of the petals with glue (Elmer's is fine, but I used Mod Podge). I then dipped the petals in glitter. Glitter along the edges gives your flower a more subtle sparkle.
I tried to take pictures of the glitter-ing, but alas, I am not a photographer. You'll just have to imagine what these flowers look like with glitter.
These are the flower clips I made today (click to enlarge):

Some have glitter and some don't. In any case, they are easy to make and oh-so-cute!
These flower clips are a great addition to a side ponytail, a messy bun, or even just behind the ear.

Best of luck in your own trickery (wink, wink).
Note: You can line your clips with ribbon, but I don't think they stay put in my hair quite as well. If you like the look of a ribboned clip, do what makes you happy.
Friday, January 13, 2012
J-E-L-L-O...it's alive!

Did you know that gelatin can help strengthen your nails?
Many nail strengtheners contain gelatin for this very reason, but I have a secret for you: you can EAT Jello, and it will help strengthen your nails. True story.
Tuesday, January 10, 2012
I spy with my little EYE..shadows!
Your face is a unique thing, no two people's are exactly alike. Maybe that's why we all wear make up differently. It definitely influences our choices to an extent; for example I'm pretty much ALWAYS the palest shade of foundation available so I don't use anything darker because its not going to look good..but some of these decisions aren't so obvious and some completely rely on opinion. Eyeshadow for example is kind of a grey area. What colors look best with your eye color, how do you wear more than one shade or color at a time, etc. There are soooo many girls out there missing out because they're scared to play with color and skip out completely, and some just wear the same eyeshadow in the same way everyday. BUT I'm just going to give the option for variety beginning with colors..
Blue Eyes are complimented—of course—by blue eyeshadow..BUT blue eyeshadow is one of the easiest colors to go over board on (for this one I'd recommend coupleing it with a simple white or black eyeshadow as well-oooh, or maybe for some fun maybe a silver?). Blue will also pop against warm colors (maybe a reddish brown?), for this one I'd try a pretty gold color. Gold work's for all skin tones and eye colors though. It's a wonder-color.
Now into specifics, if you have grey-blue eyes then blacks and greys will create a gorgeous smolder. I recommend golds alot more for you gals.
If you have violet-blue eyes (then lucky you, those are beautiful. All eye colors are beautiful but still) I'd for sure play up greens and purples (deep mossy greens would be perfect). They'd make your eyes glow in an almost eerie beauty, apply it with a smudgy liner for added effect.
For those of you with green-blue eyes yours will also look great especially with purples and greens but maybe brighter funner colors. Your eyes have the potential to be funky unlike many others.
Green Eyes are complimented with various shades of green eyeshadow (depending on the shade of green of your eyes, I'll get to that) as well as purples and gooolds (oh the wonder color).
If your eyes are that pale, clear color of green then I hiiighly recommend you wear golds, gold will make your eyes stand out more and draw attention to how magnificent they are. You also should wear pale pinks and purples to make your eyes pop.
For eyes that are a deeper mossy green then I think blacks and browns could easily compliment your eye color, greys if you dont want to go as dark as black. Dark green eyeshadows to match your eye color as close as possible is an easy color to get right even on the first try and would compliment as well.
Hazel Eyes are a color all to themselves, not quite green or brown! However there are still various shades of hazel eyes. Hazel eyes overall tend to look great in shades as greys, blacks, browns, greens, purples, and of course GOLD.
Eyes that are a lighter more-green-than-brown color then you should definately wear alot of earthy colors: browns, golds, greens. They'd all most make your eyes stand out (buuut if you play with earthy shadows be sure to use eyeliner to go with it..colors such as a mossy green or brown). Purple would also play up the green in your eyes to make it pop.
If your eyes are more brown than green then your darker eyes pull off deeper colors such as blacks, greys, deep browns, and shades of plum. A lot of these colors, however, will take some playing around with before you can master them, but that's fine! No shame, just be careful and do it to your liking.
Brown Eyes I'm not biased, but I wish I had brown eyes. They're so prettyy, so deep brown-eyed girls—I'm jealous! Anywhoo, for your eyes you can rock reddish browns (or any shade of brown, they make your brown eyes pop), deep plums, deep greens (basically deep colors work extremely well on brown eyes), and gooolds. I cannot stress enough how gold eyeshadow looks great on ANNY one. Its remarkable. Haha, but brown-eyed girls should also definately play in metallic colors because they will always look good with brown eyes.
I hope this helps some! :] love & rockets
Wednesday, January 4, 2012
new home
If you are a fan of Girly Girls, you have come to the right place! This is the new home for our lovely blog. Stay tuned for more!
Monday, December 19, 2011
holiday hiatus
You might have noticed we've been absent around here. Unfortunately, we are enjoying our Christmasing so much that you might just have to wait a few more weeks for some real posts. Sorry, dudettes.
Anyways...some changes might be coming your way, so don't give up on us just yet.
Anyways...some changes might be coming your way, so don't give up on us just yet.
Sunday, November 20, 2011
Breaking Dawn..or just Breaking Out
do you know how easy it is to break out? its pathetically easy and sometimes we dont even know what we're doing wrong. there's always the emotional aspect of stressing out or being under too much pressure at one time, or even it just simply being our time of the month...but are there some things we can do to prevent other breakouts? why yes, there are.
Conditioning. it works wonders for your hair and i'd never recommend someone to go a day without it, but. did you know that conditioners contain emolients that clog pores? so always try to either wash your face and body after you rinse out your conditioner or be sure and rinse off your back and face before getting out.
Water Temps. Sounds crazy, huh? the temperature of your water when washing your face can affect your break outs? it can. the most effective way to wash is actually to begin by wetting your face with warm water, applying face wash, and rinsing with cool water. the warm water in the beginning opens your pores and the cooler water closes them back up. BUT tricky thing is that if you end with warm water too it can actually help bacteria to grow causing acne.
Wash Yo' Pillow. have you ever noticed waking up a little greasier than you went to bed? yeah, because everyone's bodies work all night long and as a result, you prespire. buut, your bed is the one that suffers it. and sleeping on your sheets and pillow repeatedly for long amounts of time will cause breakouts.
Cell Phones. Or any types of phone really. if you use it and talk on it frequently, you may start to see breakouts on one cheek or side of your face more than the other, its your phone. simply get rubbing alcohol and a cotton ball and clean that sucker up. personally i try to clean mine about once a week.
Moisture. did you know that drying your skin out can cause acne as well? its simple to fix ofcourse, just moisturize it. but be sure to look for oil-free products when looking, for your face you'll need to use face moisturizers because regular body lotions have too much in them and can also clog up your pores and cause breakouts.
Face Touching. Dont be a face toucher, no one likes a face toucher. its the most obvious way to cause breakouts. dont pick at your face and avoid touching your face with your hands ALWAYS.
Friday, November 18, 2011
Operation: Hydration
Colder weather means drier weather, especially out here in the west. I grew up next to the Great Lakes, and we didn't have dry weather. Ever. So this desert stuff is a whole new ball game for me. However, I have found a few products to beat this arid climate.
First off is Aveeno Daily Moisturizing Lotion. Love this stuff.

 This is a great all-over lotion. It is fragrance free, which is great for my sensitive skin. It absorbs quickly and doesn't leave an oily residue. I like to lotion up after I shower. Apply to damp skin to lock in the moisture. I also carry a tube in my purse for when my skin starts to feel a little parched. If you like to apply hand lotion throughout the day, make sure you give your cuticles and nails some love, too. They tend to dry out in the winter months also.
Another product in my arsenal is good ol' Vaseline.

 I have a tube of Vaseline Lip Therapy with me at all times because I can't stand to have chapped lips. Vaseline also works really well on rough elbows and knees. I like to slather it on before bed. Use a terry cloth sweat band to cover your elbows if you like. That way, you will protect your sheets and give your elbows a better chance to absorb the Vaseline. This also works really well on cuticles. Cracked cuticles can be painful. Just rub a little Vaseline on your cuticles a few times a week, and you can avoid them cracking. Wear gloves to bed for extra protection. What about rough, cracked feet? Mine get that way sometimes, especially in the heel area. Rub some Vaseline on before bed, and pop on a pair of socks. By morning, you'll be in better shape.
For you contact wearers, dry weather can be hard on the eyes. I know when I first moved away from my beloved Midwest, I had a hard time keeping my contacts wet. Now that I've lived here for a few years, it's less of a problem. Nevertheless, I still carry eye drops with me.
 Refresh Optive is where it's at. These eye drops are boss. They are safe for us contact wearers, but even if contacts aren't your thing, these drops will work for you. They keep your eyes moist no matter the weather.
Sometimes in the winter, my hair gets a bad case of dry-frizz. Ew. To combat this, I am a big believer in serums. Connie outlined pretty well what to look for in a serum (see here), but I'll tell you two products that have really worked for me. First, Garnier Fructis Sleek & Shine Serum, and second, Fantasia IC Olive Moisturizing Shine Serum Hair Polisher.

 Both of these are bombspice. Just a little goes a loooong way. Add either one of these products to damp-dry hair, and say goodbye to the frizzies. Instead, your hair will be super-soft and lightly fragrant (both of these serums smell great). The Garnier Fructis serum might be a little easier to get your hands on, since it is sold at most drugstores or retailers like Walmart or Target. The Fantasia Hair Polisher might be available at those stores, too, but I definitely haven't seen it as often. If you can find it, snatch it up! I have been using my bottle for 2 or 3 years now, and I still have about a 1/3 of it left. I use it almost every day in the fall and winter, and a little less in the spring and summer. Just a few drops is all it takes to keep your hair hydrated.
One more quick tip for staying hydrated: drink water.
 If you aren't drinking enough water, your skin will dry out unaided by the weather.
Well, that's all folks! Don't let dry skin, nails, or hair get you down this winter!
First off is Aveeno Daily Moisturizing Lotion. Love this stuff.


Another product in my arsenal is good ol' Vaseline.


For you contact wearers, dry weather can be hard on the eyes. I know when I first moved away from my beloved Midwest, I had a hard time keeping my contacts wet. Now that I've lived here for a few years, it's less of a problem. Nevertheless, I still carry eye drops with me.
Sometimes in the winter, my hair gets a bad case of dry-frizz. Ew. To combat this, I am a big believer in serums. Connie outlined pretty well what to look for in a serum (see here), but I'll tell you two products that have really worked for me. First, Garnier Fructis Sleek & Shine Serum, and second, Fantasia IC Olive Moisturizing Shine Serum Hair Polisher.


One more quick tip for staying hydrated: drink water.

Well, that's all folks! Don't let dry skin, nails, or hair get you down this winter!
Tuesday, November 8, 2011
heads up!
Hello, friends! I don't know about you, but I love me some Sephora. There is a giveaway over at Recipe Girl, so head on over for a chance to win a $75 gift card.
You can thank me later.
Also, what are some topics you would like to see here on Girly Girls? Don't be shy. Give us a shout-out!
You can thank me later.
Also, what are some topics you would like to see here on Girly Girls? Don't be shy. Give us a shout-out!
Thursday, October 27, 2011
costuming
Halloween is right around the corner! If you are doing the last minute scramble, don't fret. As long as you are willing to get creative, a great costume is at your fingertips.
First, consider what you already have. Most of my costumes in the last few years have been comprised of stuff I found in my apartment.
Example 1: I was a Greek Goddess three years running. (I move a lot: new place/new people...it's like it was a whole new costume.) I found a bed sheet in my room and paired it with a bit of leaf garland that was adorning my apartment.


 Rad every time.
Example 2: Last year, I got a hand-me-down green organza skirt. I knew I wanted to wear it in some capacity for Halloween. So I brainstormed. I came up with a few ideas, but I ended up going with Mother Nature. I wore the green floor-length skirt and wrapped myself in some leaf garland (are you sensing a pattern here?). I topped off my look with green glamour eyes.
 Not a flattering pic, but you get the idea.
Example 3: Lady Gaga. Love her.
 Not my best work, but if you'll forgive me for that and my slouchy pose, I'll forgive you for not having a costume yet. Oh snap!
Next, think about what you can borrow and who you can borrow from. My costume this year is made up of clothes I'm borrowing from someone else. Was it a bit awkward asking a boy if I could wear his pants? Yes. But sooo worth it. Didn't cost me a cent, and it turns out he was more than willing to loan me his clothes.
Since I don't have a picture of this year's ensemble yet, here is another costume that I borrowed:
 I know what you are thinking: Best. Costume. Ever. Borrowing is boss.
Third, take a look at thrift stores. Thrift stores tend to have awesome finds for cheap. Don't be afraid to venture into sections you normally wouldn't. A male friend of mine found a purple blazer in the women's section that perfectly completed his rocker outfit. I also found a great 80s-style dress at a thrift store for the low low price of $8. I might even wear it to one of the Halloween shindigs I attend this year. What an investment.
 We. Are. Hot.
If you are still coming up empty, get punny. Clever costumes are memorable. In high school, I dressed as a cereal (serial) killer for the annual Boo Ball. I glued plastic knives to mini boxes of cereal, then attached the boxes to myself. A little corny, but it was definitely unique. I've also seen men dress up as "God's gift to women" more than a few times. Simply wrap yourself as a present labeled "To: Women From: God." At least you'll get a chuckle.
My personal favorite:

If all else fails, I suppose you can go buy a costume. But where's the fun in that?
First, consider what you already have. Most of my costumes in the last few years have been comprised of stuff I found in my apartment.
Example 1: I was a Greek Goddess three years running. (I move a lot: new place/new people...it's like it was a whole new costume.) I found a bed sheet in my room and paired it with a bit of leaf garland that was adorning my apartment.


Example 2: Last year, I got a hand-me-down green organza skirt. I knew I wanted to wear it in some capacity for Halloween. So I brainstormed. I came up with a few ideas, but I ended up going with Mother Nature. I wore the green floor-length skirt and wrapped myself in some leaf garland (are you sensing a pattern here?). I topped off my look with green glamour eyes.

Example 3: Lady Gaga. Love her.

Next, think about what you can borrow and who you can borrow from. My costume this year is made up of clothes I'm borrowing from someone else. Was it a bit awkward asking a boy if I could wear his pants? Yes. But sooo worth it. Didn't cost me a cent, and it turns out he was more than willing to loan me his clothes.
Since I don't have a picture of this year's ensemble yet, here is another costume that I borrowed:

Third, take a look at thrift stores. Thrift stores tend to have awesome finds for cheap. Don't be afraid to venture into sections you normally wouldn't. A male friend of mine found a purple blazer in the women's section that perfectly completed his rocker outfit. I also found a great 80s-style dress at a thrift store for the low low price of $8. I might even wear it to one of the Halloween shindigs I attend this year. What an investment.

If you are still coming up empty, get punny. Clever costumes are memorable. In high school, I dressed as a cereal (serial) killer for the annual Boo Ball. I glued plastic knives to mini boxes of cereal, then attached the boxes to myself. A little corny, but it was definitely unique. I've also seen men dress up as "God's gift to women" more than a few times. Simply wrap yourself as a present labeled "To: Women From: God." At least you'll get a chuckle.
My personal favorite:

If all else fails, I suppose you can go buy a costume. But where's the fun in that?
Saturday, October 22, 2011
Penny Pingleton, I Love You!
Hokay, so Halloween. you know the classic musical turned movie "Hairspray!"? :D great one huh? well personally my favorite character is Penny Pingleton! shes fun, funny, quirky and cute. SO, she's ofcourse known most for her hair..
so how do you get her fabulous do? lemme tell ya.
i first started with straight hair parted down the middle, and your hair doesn't have to be perfectly flat ironed or anything, just smoothed out.

the next step can be done one of two ways. first remember to leave some of your bangs down to frame your face..but to create the beehive on top of your head you can either tease your hair using hairspray and a comb or use a BumpIt (i recommend a BumpIt because this is considerably less damaging to your hair) and after you've pulled your hair about half up into a bump, secure in back with a discreet rubber band.

now, easily pull the remainder of your hair into two high piggietails and get your curling iron/curlers or curling instrument of choice ready because you're almost done!

lastly curl your piggie tails in sections, i did two curls in each one..but feel free to do as many as you want! and also, if you want you can grab a small piece of hair from the bottom of the piggy tail to wrap around and bobby pin to hide the elastic you used to secure your hair.

and voila! your done!
Subscribe to:
Posts (Atom)